Greeting

 
These pages stem from the start of my loft modelling odyssey up to the great Covid 19 lockdown enforced upon me.  
 
News of developments from 2021 onwards to be found here.  

My Musical Adventures - My other hobby - only for the brave: https://barrykingsbeer.bandcamp.com/releases

Wednesday 27 February 2019

A minor diversion

I decided to build my two granddaughters their very own model railroad, at three  and six they are not too young to start on this hobby.  To keep it small enough to compete with their existing overflowing toy chests I opted for the scale of HOn30, known over here as 009 or HOe.  This will allow a small 0-4-0 loco and very tight curves. I intend to use all the structure bits I have lying around that probably won't make it to Cuspidor and to include as much visual and play interest as the small size can hold.

As usual I have a basic idea and then plan as you go takes over but so far so good.

The baseboard

The base is a simple box, diagonally braced, made from glued and screwed 9mm plywood with an extended back to support a backscene and the buildings on Main Street. Why is it that a simple box is so hard to make? I later added a raised side on the right to accommodate a tunnel through a mountain (hill). I have a mad idea that I could build a small canyon with a removal roof and portals so the girls can have a changearound if they want. That will be interesting to work out.... I jigsawed out a dropped area for an inlet of the sea or a lake so I could use an old bridge I had and to provide a water area. I pinched a backscene from the net and printed it out and stuck it on the rear wall, I have yet to source a picture of a disappearing road for the end of Main Street.


Structures
I had an old AHM plastic fire house kit; why I bought it I have no idea.  I built it then sawed it in half.  Now we have a Fire House and the rear, with a load of bashing is now the Rialto Cinema (now showing Runaway Train starring Jasmine and Darcie Webb).

I also had an old Smalltown USA shop kit that got the same treatment and now provides two stores, Darcie's Dresses and soon to be the Jasmine tearooms.

A further half store kit that I had already built is now Bob's Bazaar and Antiques.  I need one more building and have run out of store/scrapbox items so must resort to buying something suitable.

I intend to light some of the buildings and add some interior details, thus adding to the complexity, as is my wont.

I have an old IHC farmhouse that I plan to build and install in the front left corner and will have a spur siding for a small industry.  I shall also have to build a small station which will be across the road from the shops.  Space being at a premium I will make Main Street a combined road and railtrack with suitably buried trackage.
Work in progress


Motive power, track, controls etc

Just when it was all going so well I bought a new old stock BCH Minitrains 0-4-0 Baldwin with six ore wagons on Ebay, which would be ideal, I had to return them today as the only thing that worked on the loco was the headlight. I doubt the shop can repair it so I placed an order for an 0-4-0 mechanism from Japan today on which I will place a suitable body.  I will probably use Peco n scale track as, according to a UK modeller who exhibits widely, it is more reliable than their 009 track and the switches work better too. I shall buy a single analogue walk around controller from Gaugemaster which comes with a mains transformer and that should do fine.

Wednesday 20 February 2019

From a light fitting to a lime kiln.

What you can see in an everyday object

I recently redecorated our bedroom and a casualty was an IKEA pendant light fitting which took silly EU bulbs and was replaced with a proper British style fitting. Before trashing the whole thing I was looking at the shroud which sat on top of the glass shade.  "That looks the right size and shape for a lime kiln" I thinks to meself.

I thought I'd make a disused one and would hack a few holes in the plastic, and place some stonework behind peeping through the adobe over layer - easy. It turned out to be made from mild steel and needed a metal cutoff disk in my Dremel to do the business - not so easy.  I won't bore you with all that but will let the following pictures tell the most of story.

After cutting out two suitable holes I glued some Noch (I think) foam stonework behind them.  I used UHU POV cement thoughout this model.

I added styrene brick door columns and an arch header and glued them in place. Next I applied a thickish coat of Tamiya earth texture paint for the adobe covering. Some weathering powders and black acrylic paint tidied it up, or untidied it up.


 The next problem was the top port. I thinned out a strip af the Noch stonework as it isn't very flexible. Then I wrapped it round a suitable dowel and glued it on and cut it off.


I made a steel hatch from 10 thou styrene to plug the top port and glued it on.

Then I built up the joint with more earth mix and coloured it to match.

I added a doorway liner of matt black card and glued this inside.

Next I fabricated a steel door from 10 thou styrene with strip braces and a handle, painted this a rusty colour and glued it in.

The finished article. A tribute to my recycling skills....

Monday 18 February 2019

This and that

Progress report

After such a long absence from the loft I couldn't find anything. Tools, supplies, models, paints etc, etc.  The black hole that swallows all modelling items had struck again.  It was time to get a grip.  Subsequently I have upturned, dug out and rummaged through every kind of container I could find in the loft. I added some useful shelves and some tool holders over my bench and thoroughly re-organised everything so that most stuff that I use frequently is now to hand and easy to return to its home. This may just stop my bench turning into the chaotic pile that I normally model in. I can but hope.  I have found so many kits and bits that I should already have built that I am embarking on a programme of action, bearing in mid my right hand will be all but useless for a couple of weeks after my imminent op.I also fancy building the girls a mini HOn3 layout that they can have at home.  If I can find the trains that I want that will be a fun project and the girls can help with the design and selection of structures and scenery.

Saturday 16 February 2019

Doggone mule!

I finally found Pete's mule Charley after having a radical sort out of my many scrapboxes.  It had a base that I had to cut off with my X-Acto and trimming the bottom of the hooves was a surgical process but that got done without mishap.  Next was painting, I printed off a reference picture from Google and set to with various acrylics.  I'm quite pleased with the result.  I needed to make a halter to hitch Charley to the trailer and used a strand of sisal from the string I use for pine trees. After a tricky bit of tying and gluing I got the pesky thing fitted; a second pair of hands would have helped here. Anyhow this is the final touch until I actually find Pete that is.........
Holding onto mule and sisal while the glue sets.


The caravan proceeds at a gentle pace...

Pete has been found hiding in a box.


Thursday 14 February 2019

A trailer for Prospector Pete

As the little house on wheels now seems to belong to Prospector Pete, Cuspidor's roving gold optimist, I felt the need to supply him with a trailer for his equipment.  I dug into my scrap box and found a body from a small, plastic tipper truck kit, a pair of white metal wheels of suitable size and some other bits and bobs and so began an afternoon's pleasant whiling away.  Here's the story in pictures.


The main parts

Plastic rod axle and some styrene strip notched for axle supports.

Axle support in place

Body assembled and some scrap kit parts for a drawbar assembly


Drawbar attached


Primed


Distressing the body with my Dremel


Colour and first rust treatment

Loaded up

There is a sluice table, tools, gunpowder barrels and a crate.

How the two models will look together

Monday 11 February 2019

Back to the past 2


The last stage

I realised yesterday that the truck body was by ConCor/Heljan and not Jordan.

The dormer was built by trial and error using matching siding and some clear styrene at the bottom triangle for side windows.  I added a roof made from thin card and covered it with masking tape "tarpaper" for a contrast to the wooden main roof.


Some roof trim was added and a radiator which was followed with lights and a bumper (fender). Rear mudguards were made from bent up strips of 10 thou styrene and cemented on.

A few "well travelled" details were added with extensive weathering (I think I see this a a prospector's mobile home perhaps) and tomorrow I'll finish it with a Colorado number plate and a small smoke-jack. 


It's not as twisted as this photo suggests, I think I had a weird camera angle.

This was a fun project and I'm pleased with this little truck even though it certainly isn't a foreground model but then they also serve who stand and wait...

And finally.....

 Rear details finished with a rope around the water barrel and a 1936 Co license plate.


Somewhere in the Cuspidor Valley.
Job Done!

Sunday 10 February 2019

Back to the past!

 A small model to get me started again.

I haven't done any modelling for over a year due mainly to the scourge of osteo-arthritis and operations. (One more at least to go). I've missed spending time up in the loft building the railroad and it is in a sorry state at present so I will be embarking upon a major cleanup and fix in the near future, especially as my eldest granddaughter Jasmine has been bugging me to show her the trains again and half term beckons.

Online looking at a collection of old photos, I found these two and decided that this would be a challenging little project to get the modelling juices flowing again. But which one do I choose? Yep it has to be the really hard little house on wheels. 


So Here we go, I make no promises that it will end up a success as the dormer is a beast in this size.

The model:

First up, I needed a truck of some sort and I settled upon an old Jordan Ford kit from my store.  I needed the chassis and bonnet (hood) and wheels plus some detail bits. The body of the "house" will be styrene siding offcuts from the scrap drawer. 

I studied the picture and planned the model extensively..... Er, I thought about the best way to build it and hoped for the best.  It's a sort of build as you go project and if it works - great, if not, I'm sure a scrapyard in Cuspidor can make use of it.

The first job was to slice off the cab at the firewall, this was done with a razor saw and cleaned up with emery paper and files.


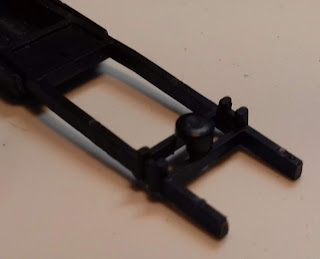
Next I shortened the rear chassis rails by a foot or so and then ground off the non-scale axle holders (that lump on the crossrails).

I cut short the cab floor and took off the running boards.


Then I cut the base for the floor and glued it and the cab floor to the chassis.


I drew up and cut out the walls from scribed siding and added trim corner boards.


I'll spare you the details of assembling the walls, it was tedious, fiddly and  pesky.  Making a box with thin styrene cut small is not my idea of fun. I cut out appropriate holes and added a glazed Grandt Line caboose door and an oriole window, which I felt gives it a suitable air of joix de vivre.  Here are the sub-assemblies with a touch of sap green acrylic and some dust. The dust indicates the sloppy chaos that my work space turns into all by itself.


I cut out and glued a suitable sub roof and then attached the dormer front to the top of the cab. This was a bit tricky but I glued some glazing to the back of the dormer and then attached it in place with canopy glue.


The next challenge is to build the glazed dormer sides. Frankly I'm dreading it but we'll see how that goes........