Greeting

 
These pages stem from the start of my loft modelling odyssey up to the great Covid 19 lockdown enforced upon me.  
 
News of developments from 2021 onwards to be found here.  

My Musical Adventures - My other hobby - only for the brave: https://barrykingsbeer.bandcamp.com/releases

Thursday 10 December 2015

An old tailings dump.

Lurking in my box of treasures was a little wooden loading ramp.  Suitably de-constructed it provides the perfect disused tailings dump platform for the Lady Wendy Mine.
I bet there are some snakes under there!
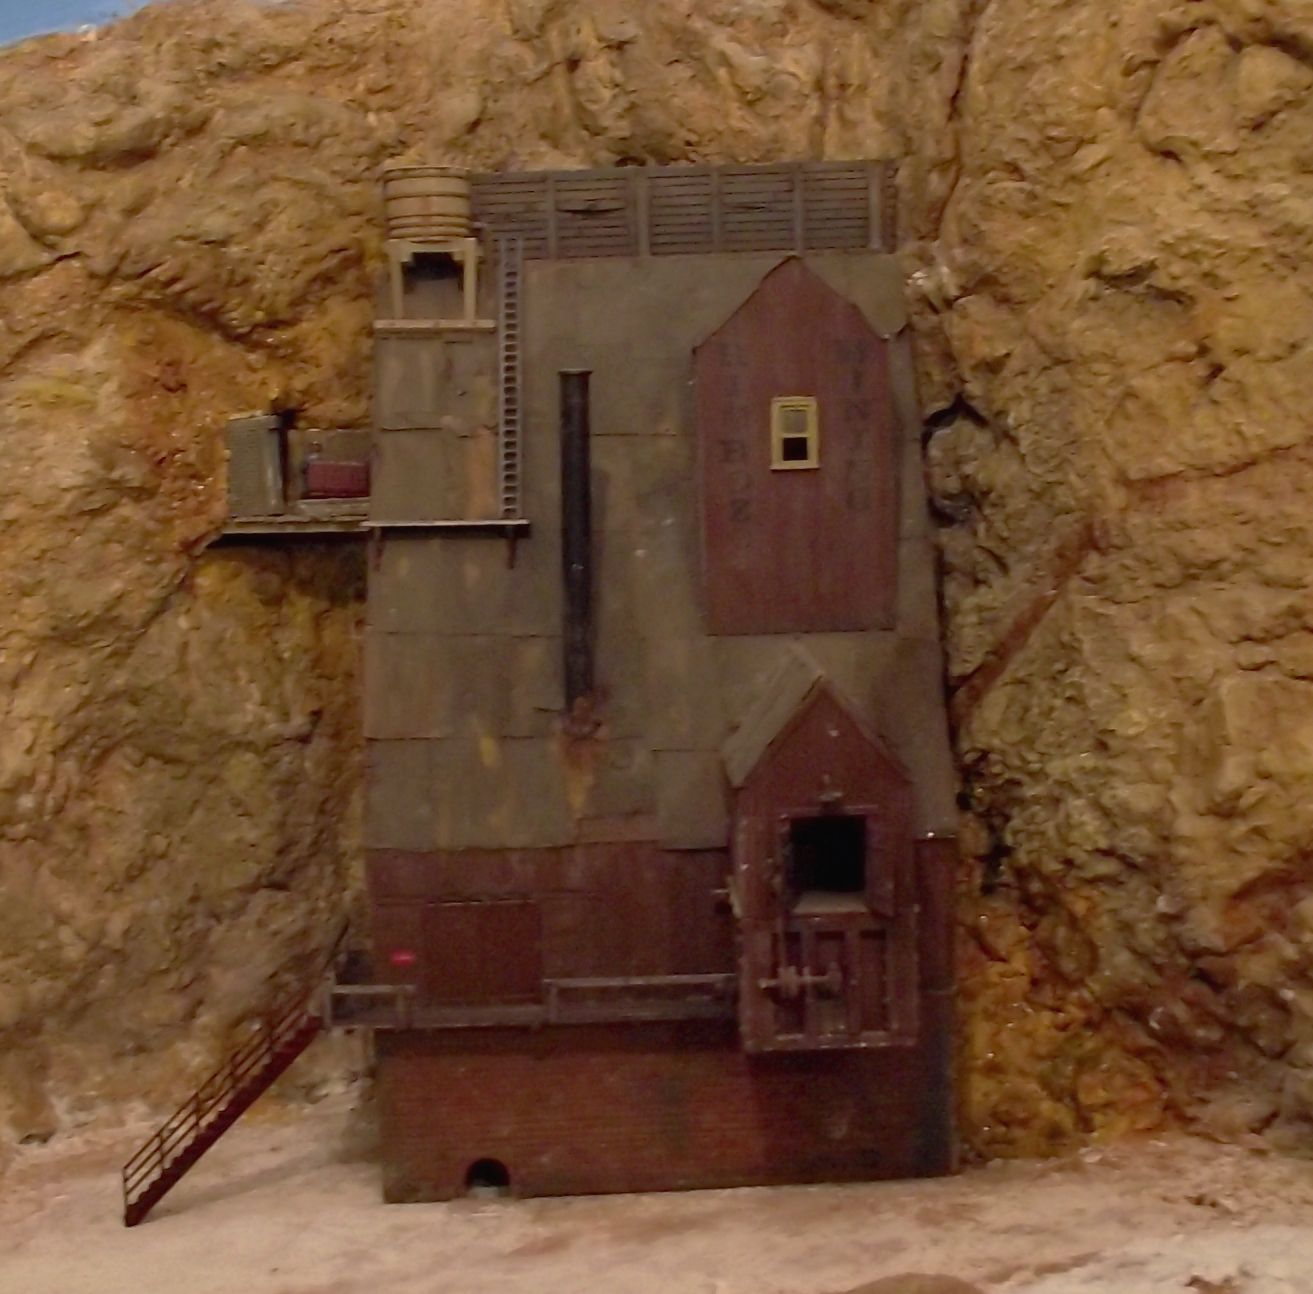
In context

And another miner's shack

I'd hope to squeeze three shacks in but there isn't really room so this will be the last. Here are the two sited on the little bluff at San Felipe de Tapas.
Jeb Bush has just put fancy new green tarpaper on his roof. Tiddles the cat seems to approve.

Next door old man Schmidt is a keen gardener even though room to grow is in short supply.

The two cabins


Monday 7 December 2015

Another miner's shack

Just finishing this off then with another to be built it will occupy the little bluff overlooking the diner and the Plughole Falls.  I had a little piece of Heki or Noch resin stone wall left so used it for the back wall. The rest is board on board over card and the roofing felt is just painted typing paper strips. A one day project and fun to do.


The mining sector of Cuspidor almost finished.

Here is the vista showing two of the three mines on this wall.  I just have to add the tramlines to the tram trestle and install it.  I'm pretty pleased with the seam between the access hatch and the layout.  Lots of foliage and a few trees to be added plus more trash outside the mine shacks.
Saratoga Mine at left and the Lady Wendy at the right.

Miner's shacks for the Lady Wendy Mine - no more bath nights!

I mentioned to a friend on Trainlife.com that the shacks needed a tin bath.  No sooner had I had the thought than I knew I'd have to make one. It took a strip of foil from a proper wine bottle top for the sides and base, a pencil to shape it on and a strip of sellotape plus a lot of gel and plain ACC to fit the sides to the bottom.

Sunday 6 December 2015

Miner's shacks for the Lady Wendy Mine

I reworked the bluff to the right of the mine so that I could put up some miner's cabins.  

Suitably derelict and ready to go
Rudimentary interior detail


Saturday 5 December 2015

A bit more detail


The broken glass from the windows is microscope slide glass ground up. This is a hazardous process and demands eye protection and care.

Friday 4 December 2015

The Lady Wendy Mine

One of Cuspidor's early gold mines, the Lady Wendy, played out long ago. Named for the beloved wife of the owner and for the present Mrs K it, (not the present Mrs K, perish the thought), is now run down and abandoned.  Unlike the nearby Saratoga Mine this old place is not sitting on a vein of sought-after rare earth metal, only some quartz and pyrites of no value, so she sits and moulders away while time and weather take their toll.   I pinched the basic design of the structure from a kit company and built it from scratch using scale shiplap for the walls (except the rear walls which are plain balsa as they won't be seen).

The roof is card overlaid with birch stripwood. The tarpaper roof was an experiment, it is strips of black gaffer tape, painted with black acrylic and weathered with washes.  I'm not sure it is a technique I'll use again. The sharp eyed viewer will notice that the hole in the roof betrays the fact that I goofed. The purlins and rafters are the wrong way round! Too late to change and hopefully no-one cares enough to complain!  I still have to disguise the seams but think I have figured a way to do it. All in all I'm very pleased with this simple structure and there's more detail to be added when I get time to play.
The base of the mine and access hatch to track below

The two mines


Monday 30 November 2015

Setting the mine scene up

I had a set of mine buildings that I built at the same time as the mine many years ago.  Sadly these would not fit the new layout. However I took a look at them, did a bit of deconstructing and have now got two salvaged structures in the scene.  Here are some photos with the tramway removed for clarity.

Watching the dogs argue over a bone. The man with the sledgehammer is an old
 British made Mastermodels OO scale metal figure. I've had him since I was 
about nine years old and always wanted to put him in a scene.


Saturday 28 November 2015

Ore tramway

I built a trestle tramway for the ore taking it from the ore bin on the mine to a projected tipple on the cliffside which will deliver it to rail wagons underneath.  I managed to make a false start by building it too high so had to dismantle all the trestles, shorten them and re-assemble.
The tramway in position with extra earthworks for support.
The next step will be adding an 18 inch tram line but I need to buy the bits for that. I can add some sway braces to the trestles too.

Braces added


Pedro Alvarez the Mine' s Chief Engineer opening a crate which he hopes contains a spare trackle valve for the steam room. 


Friday 27 November 2015

Settling tanks for the mine

To use up what could be visually a dead spot behind the stairs, I decided to build a trio of settling tanks and a plinth to put them on.  The tanks were made from plastic tube and bottle caps, Two were clad in scale lumber, the small tank looks like corrugated metal.
Large tank is the rim of some plastic thingy with a cone shaped bottom.  The small item is the tip of this cone, sawn off and stuck to a metal frame.  it will become a mining junk piece.

The middle tank  has masking tape bands added

Roof on

The tanks in situ


Thursday 26 November 2015

Saratoga Mine 3

I thought fitting the mine into its site was going to be a nightmare with three separate forms to bring together but it went easily as it happens.
Sculptamold in place

First paint treatment

Ground texture applied. I'm using ground cat litter and WS ballast mixed.  I'll colour and weather it when dry.

Saratoga Mine 2

The fun part in all this is getting a seamless fit between the Mine and the side adit and the plaster rock walls.  I hacked the adit out with my Bosch magic saw and am now infilling with Sculptamold just roughly slumped on.  It's a bit a of a thee dimensional puzzle to put together but hopefully I'll get there in the end.


The site
The mine, the adit entrance and the rock are three separate items, the puzzle is how to get them all together as one!
A bit of detail
I felt I was being too cavalier with the lives of my little plastic miners so I installed a safety railing.

Monday 23 November 2015

Saratoga Mine

Many years ago I scratchbuilt a model of Malcolm Furlow's Saratoga Mine from plans in the Gazette.  Its original location on a diorama was in a corner, however the corner it's in now is a mirror opposite so I've had to make some changes.  There was a set of matching buildings, none of which fits the new location.  Oh well...
New support wall installed to raise the mine up.
Access platforms added
Rock fence to shield roof
Fence is angled forwards to catch rock fall.
Home for the mine
Trying for size
Rock fence fitting
Tailings platform and trestle
Trestle halved!
Chute and wall added, tailings pile started


Tailings pile growing