Greeting

 
These pages stem from the start of my loft modelling odyssey up to the great Covid 19 lockdown enforced upon me.  
 
News of developments from 2021 onwards to be found here.  

My Musical Adventures - My other hobby - only for the brave: https://barrykingsbeer.bandcamp.com/releases

Monday 22 February 2016

Ashford's finished.

I decided to add a small boilerhouse to fix the smokestack to and used some spare wall from the kit.  I wanted to add a small window to add interest so I cut down one of the left over windows and ended up with the curved top and one row of panes.  I then sliced off a curved brick lintel from a spare window using a fine razor saw held flat against the plastic. I marked out the hole and drilled, cut and filed till I got a good fit.  I painted the boilerhouse to represent blue engineering bricks.  After fixing the boilerhouse and chimney there was an unattractive gap behind so using bits of walls from my scrapbox I made a curtain wall to fit. That's it.


The finished article


Bedded in with loading dock


Sunday 21 February 2016

Rio Bozo Consolidating

The second and larger structure made from the Atlas Middlesex Manufacturing kit. Made in the same way as Ashford's. All in all I'm very pleased with the result of a couple of day's enjoyable effort. £50 for a plastic kit still hurts to my old fashioned sense of value but I'd definitely look at Atlas' offerings again.
All those windows get a wash. I worked out a better way to glue on the glazing.  Turn the sprues over, spray the glue then glaze, then cut out. No mess, no fuss and no glue marks on the glazing.


Minimal bracing. Once the roof was glued in it became quite rigid.

Again minimal bracing.


Pretty well finished. The main changes, apart from completely reworking the walls, were putting in different freight doors. I didn't put in the basement windows as they won't be seen when the loading dock is built.

Saturday 20 February 2016

Ashford Mining Supplies


My Atlas Middlesex Manufacturing kit arrived and will make two good sized flats for the back wall.  I'm more impressed by the quality than I expected to be. This is the smaller of the two structures. This is a large kit and I studied it for a while before seeing how to create the two structures I wanted.
The Walls

Windows!! Windows painted with rattle can grey car primer


Front wall - I cut this prematurely along the tower side so stitched it together again!

All walls painted, ready for assembly. I misted rattle can white car primer on this building then wiped on some thin tan acrylic for mortar followed by alcohol weather wash.


A few open windows for variety

After glueing in the windows with a lick of cement I masked the back of the wall and cut out around the windows.  Then I sprayed the backs with craft spray adhesive and stuck on the glazing.  This leaves no trace of adhesive on the "glass". Then I removed the masking tape with the adhesive on it.


Windows fitted
A piece of plastic bracing was added before I glued on the sides, roof and chimnies.

Pretty well complete except for loading dock and the chimney will be higher up the side of the building when planted.

Thursday 18 February 2016

Victor Mine rockwork


I'm having to extend the mountain sides on either side of my long (sic!) wall to cover the ends of the 8 foot backdrop.  I will have to plaster in the main mine building too but now I'm re-ordering plaster.


Test fit
Plaster poured into moulds and ready to slap on
Rockwork on
Getting there...


Rocks painted


Wednesday 17 February 2016

The Victor Mine continued

The second structure is pretty well finished.  Here are some progress shots.


Behind the scenes, a thing of beauty and a joy forever.  At top is the main shadow box wall with "machinery" that will show through the gaps. I think this illustrates my philosophy of using up scraps and unconsidered trifles. Very little goes to waste in Cuspidor.  Behind the model doesn't need to be elegant, we're only concerned with the show out front and the old wood  and bracing ensures a stable model.
Shadow boxes fitted
Old technology
A closeup. The spillage is thin superglue sprinkled with bicarb and washed dirty.
The scene


Tuesday 16 February 2016

Lady Wendy Mine finished


Pretty well greened up.


I found a better home for my little wooden derrick.

The Victor Mine


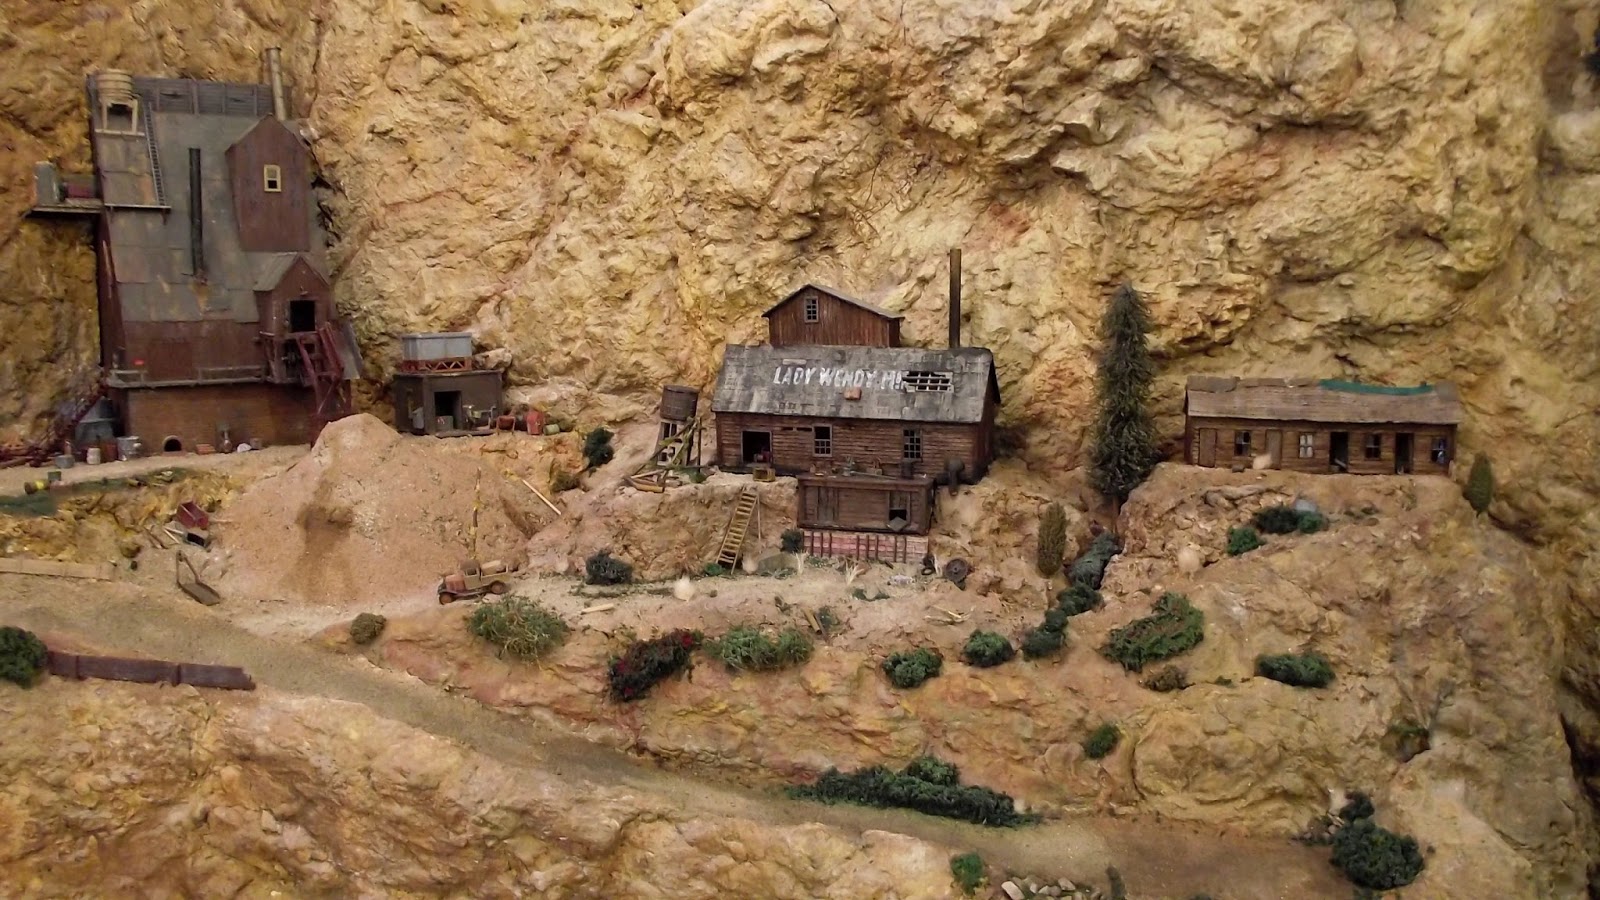
Having installed my new mountain valley backdrop from Affordable Model railroads, it was time to think about building the background flats for the long wall behind the depot yard.  I'm really pushed for space here so only flats will do. I started with another defunct mine, this one named the Victor Mine after my wife's father whom sadly I never met. I like to think he would approve.


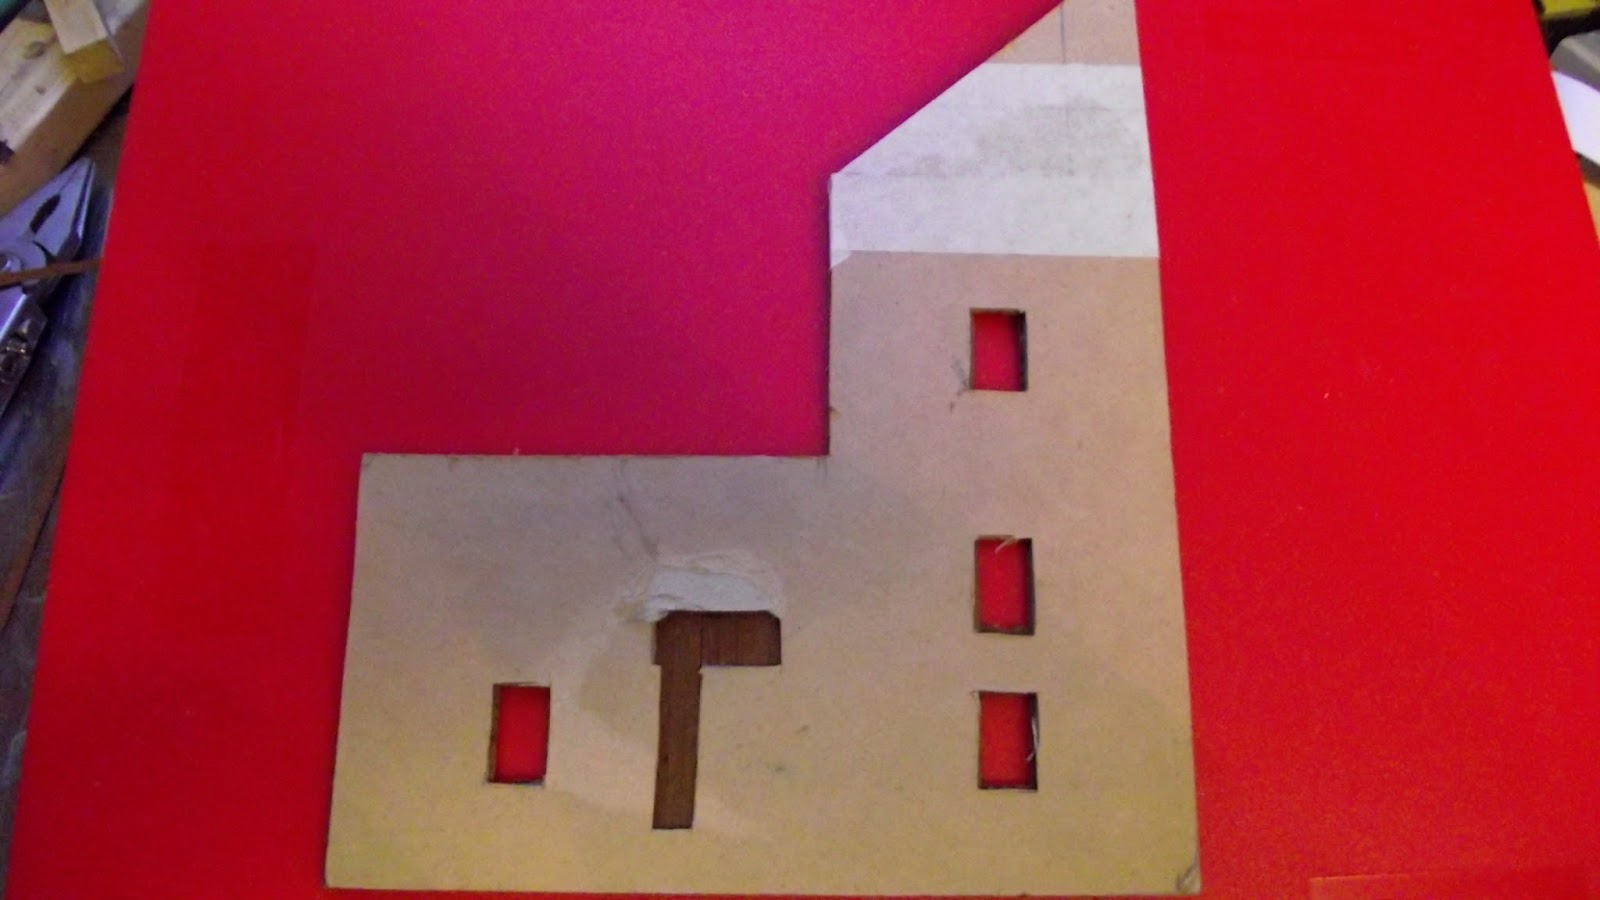
I went through my usual design phase, 5 minutes thinking about it and then making a rough drawing.  Then I transferred the outline to a piece of old shop display card which I cut out and then clad with thin mahogany veneer strips intended for model ship building. I bought these years ago when we still had model shops.  The grain is very pronounced and the finish is quite rough. Ideal for derelict wooden structures.  I used PVA white glue to fix the boards and made a few gaps for distressing etc.  A few windows from an old plastic kit and that was pretty well it.  This is to be the first flat on the left and I have to extend the rockwork across to meet it.


The wood was weathered using a light silvery grey watercolour pencil with a light Alcohol/Aniline dye wash.
The Victor Mine, this will be sited about an inch and a half higher on a rock outcrop

It occurred to me to extend this mine with a processing building so off I went again with my extensive planning process (Ahem).
Showcard walls and ceilings with a cut down slice from a roll of tape for a rooftop settling tank to add interest
A chute to link the buidings


Card skin, weld seams pencilled in
Rear of "tank"

Tank sprayed base coat of steel from a rattlecan. Rough welded seams made by scribing with my Xacto blade then running in a thin line of gel  super glue and setting with a kicker.
Windows cut, cladding glued on and a change to the roofline.
New roof line spliced on and gaps for lost boarding
How the two structures will fit together.